
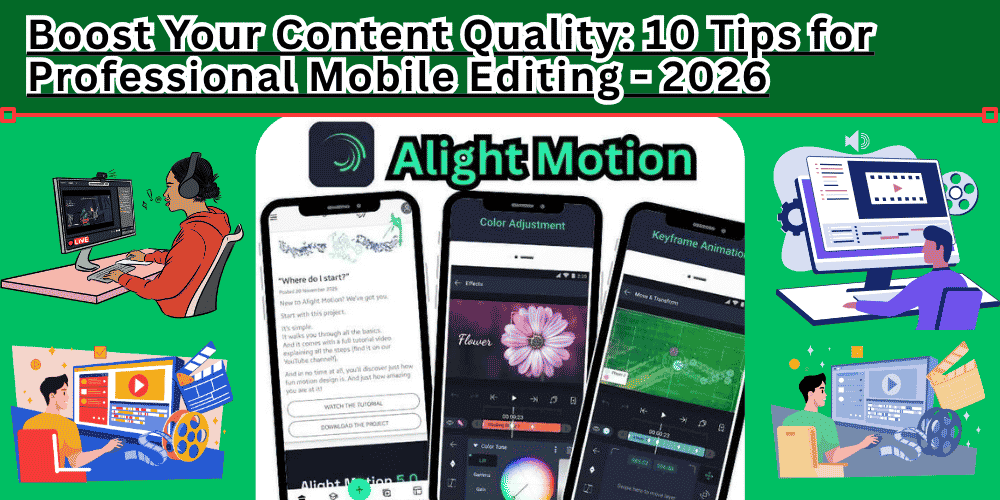
Hey there, fellow creator. Welcome back to my channel. Or, well, welcome to this article. I am going to talk to you like we are sitting together having coffee, okay? No fancy jargon. No robot talk. Just real talk about how you can take your mobile videos from looking like they were shot on a potato to looking like they belong on Netflix.
I have been editing on my phone for years now. And let me tell you something. The game has changed completely in 2026. What used to require a thousand-dollar laptop now fits right in your pocket. But here is the catch. Having the tool is not enough. You need to know how to use it properly.
So today, I am going to share with you my 10 golden tips for professional mobile editing. These are the exact things I use every single day to make my content pop. And I promise you, if you follow even half of these, your audience will notice the difference immediately.
Tip Number 1: Start With the Right Settings
Okay, this might sound boring. I know. You want to jump straight into the fun stuff. But trust me on this one. If you start with the wrong settings, your whole video is doomed from the beginning.
Think of it like baking a cake. If you set the oven to the wrong temperature, it does not matter how good your ingredients are. The cake will be ruined.
So here is what you need to do in 2026. Open your editing app. Any app. Alight Motion, CapCut, VN, whatever you use. Look for the project settings. Set your frame rate to at least 30 frames per second. If your phone can handle it, go for 60. That is the secret to buttery smooth motion.
Next, your resolution. Always choose the highest option available. Usually that is 1080p or 4K. Why? Because you can always make a big video smaller. But you cannot make a small video bigger without it looking like garbage.
And lastly, your aspect ratio. This depends on where you are posting. For TikTok, Instagram Reels, and YouTube Shorts, go with 9:16. That is the vertical format. For YouTube main videos or Facebook, use 16:9, which is the horizontal landscape mode.
I cannot stress this enough. Getting this right at the start saves you so much headache later. Do not skip this step.
Tip Number 2: Light Is Everything
You know what separates amateur videos from professional ones? It is not the camera. It is the lighting. I have seen people shoot on expensive iPhones and the video looks terrible. And I have seen people shoot on old budget phones and the video looks stunning.
The difference was always the light.
Natural daylight is your best friend. If you are shooting indoors, sit near a window. Face the window. Let that beautiful soft light hit your face. Do not put the window behind you. That makes you look like a silhouette. That is the classic rookie mistake.
But what if you are shooting at night? Or in a room with no windows? No problem. Buy a cheap ring light. You can get one for like twenty bucks these days. Place it behind your phone. Angle it slightly down toward your face.
And here is a pro tip from me to you. Never use the overhead ceiling light. That creates harsh shadows under your eyes. It makes you look tired. Nobody wants that.
When you have good lighting, your editing app has more information to work with. The colors look richer. The skin tones look natural. You can push the video further in post-production without it breaking apart.
Tip Number 3: Master the Art
ye website ka article ha tu es lehaz se likho k log meri website py a k par rahe ye article , meri site ye ha “https://alightmotionapp.site/”
Boost Your Content Quality: 10 Tips for Professional Mobile Editing in 2026
Hey there, and welcome to alightmotionapp.site!
If you have landed on this page, it means you are serious about making your videos look better. And you know what? You have come to the right place. Today, we are going to have a real, honest conversation about mobile editing. No fancy tech jargon. No robot-sounding advice. Just straight talk from someone who has been in your shoes.
I know how frustrating it can be. You shoot a great video. You have a cool idea. But when you put it together, something just feels… off. It does not look like those polished videos you see on Instagram or YouTube. The difference between an amateur-looking video and a professional mobile edit is not about having the most expensive phone. It is about knowing a few simple secrets.
In 2026, the tools we have on our phones are more powerful than ever. Apps like Alight Motion have brought Hollywood-level effects right to our fingertips. But having the tool is only half the battle. You need to know how to use it effectively.
That is why I put together this guide. These are the 10 tips I personally use to level up my content. And I promise, if you apply even half of these, your audience will notice the difference immediately. Let us dive in.
Tip Number 1: Light Is Everything
Let me start with the most important tip. And it is not even about editing. It is about what you do before you open your editing app.
Lighting is the foundation of a good video. I have seen videos shot on expensive iPhones that looked terrible because the lighting was bad. And I have seen videos shot on old budget phones that looked stunning because the lighting was perfect.
Here is the golden rule: Natural daylight is your best friend.
If you are shooting indoors, sit near a window. Face the window. Let that soft, natural light hit your face evenly. Do not put the window behind you. That creates a silhouette and makes you look like a shadow. That is a classic rookie mistake.
What if you are shooting at night or in a room with no windows? No problem. Get a cheap ring light. You can find them online for just a few dollars these days. Place it behind your phone, slightly above eye level, and angle it down toward your face.
And please, never use the overhead ceiling light. It creates harsh shadows under your eyes. It makes you look tired and unprofessional.
Why does this matter so much? When you have good lighting, your editing app has more visual information to work with. The colors are richer. The skin tones are natural. And when you apply effects or color grading later, the video will not break apart or look pixelated.
Trust me on this one. Good lighting can make a mediocre edit look amazing. Bad lighting will ruin even the most complex edit.
Tip Number 2: Start With the Right Settings
Okay, I know this sounds boring. You want to jump straight into the fun stuff, right? Adding effects, playing with transitions, making things move. But here is the thing: if you start with the wrong project settings, your entire video is doomed from the start.
Think of it like building a house. If the foundation is weak, it does not matter how beautiful the paint is. The house will crumble.
So, before you add a single clip, take two minutes to set up your project properly. Here is what you need to do in 2026:
- Frame Rate: Set this to at least 30 frames per second (fps) . If your phone can handle it, go for 60 fps. This is what makes your motion look buttery smooth. Jerky motion is a dead giveaway of amateur editing.
- Resolution: Always choose the highest resolution available. Usually, that is 1080p (Full HD) or 4K. Why? Because you can always make a big video smaller. But you can never make a small video bigger without it looking like blurry garbage.
- Aspect Ratio: This depends on where you are posting.
- For TikTok, Instagram Reels, and YouTube Shorts, choose 9:16 (vertical).
- For YouTube main videos or Facebook, choose 16:9 (horizontal landscape).
Getting these settings right at the start saves you so much headache later. It ensures your video looks sharp, smooth, and perfectly fits the platform you are targeting.
Tip Number 3: Master the Art of Cutting
Here is a hard truth: Your viewers have zero patience. In 2026, attention spans are shorter than ever. If your video has even a second of dead air or boring footage, people will scroll right past you.
That is why learning how to cut properly is so important.
A professional edit is tight. Every single shot has a purpose. Every second moves the video forward.
So, when you are editing, ask yourself: “Does this clip need to be this long?” Be ruthless. Cut out the pauses, the hesitations, the moments where nothing is happening.
Here is a pro tip: Use the “Jump Cut.” A jump cut is when you cut out the middle of a clip to remove a pause. For example, if you are talking and take a breath between sentences, cut that breath out. The video will jump forward slightly, but it keeps the energy high and the pace fast.
On Alight Motion, you can do this easily using the split tool. Just tap on the timeline where you want to cut, select “Split,” and delete the unwanted part. It is that simple.
Remember: Shorter and tighter is almost always better. Your viewers will thank you for respecting their time.
Tip Number 4: Use Keyframes to Add Life
If there is one feature that separates beginner edits from professional motion graphics, it is keyframes.
What is a keyframe? In simple words, it is a way to tell your app: “At this point, the object is here. And at this later point, I want it to be there.” The app then magically creates the animation in between.
Keyframes allow you to make things move, scale, rotate, fade, or change color over time. This is how you create those cool animated text intros, smooth zooms, or objects that slide across the screen.
Here is how you use keyframes in Alight Motion:
- Select the layer you want to animate (text, image, video clip).
- Move the playhead (the blue line) to the start point.
- Tap the stopwatch icon next to the property you want to change (like Position or Scale). This adds your first keyframe.
- Move the playhead to the end point.
- Change the property (for example, drag the object across the screen).
- Alight Motion automatically creates the movement between the two keyframes.
It sounds technical, but it is actually very intuitive once you try it. Playing with keyframes is one of the most satisfying parts of editing. It is where your static images come to life.
Tip Number 5: Audio Quality Matters More Than Video
Here is a surprising fact: People will tolerate bad video quality, but they will not tolerate bad audio.
Think about it. Have you ever scrolled past a video because the sound was scratchy, too quiet, or had background noise? Of course you have. We all have.
Good audio is non-negotiable. It is the backbone of viewer engagement.
So, how do you get good audio on a mobile device?
- Record in a quiet place. Close the windows. Turn off the AC or fan. Put your phone on silent.
- Get close to the microphone. The microphone on your phone is usually at the bottom. Make sure it is pointing toward you and not covered by your hand.
- Use a clip-on lavalier microphone. You can buy one for a few dollars. It plugs into your phone’s headphone jack or USB-C port and clips to your shirt. This gives you clear, professional-sounding audio instantly.
- Clean up your audio in post. In Alight Motion, you can use the audio tools to reduce background noise or increase the volume. There is a simple “Noise Reduction” slider. Turn it up a bit to clean up the hiss.
And if you are adding background music, make sure the music does not overpower your voice. The music should be in the background, not the main event. In 2026, most editing apps, including Alight Motion, let you adjust the volume of each audio track independently. Use that to find the right balance.
Tip Number 6: Color Grading Makes You Look Like a Pro
Have you ever noticed that movies and high-end YouTube videos have a certain “look”? The colors are not exactly like real life. They might be a bit warmer, cooler, or have a specific mood. That is called color grading.
Color grading is the process of adjusting the colors in your video to create a specific feel. It is one of the most powerful ways to instantly make your content look cinematic and professional.
And the best part? You do not need to be a color expert to do it.
In Alight Motion, there are simple color tools you can use:
- Brightness and Contrast: Start here. Increase the contrast slightly to make the darks darker and the brights brighter. This adds pop to your video.
- Saturation: This controls the intensity of colors. A little extra saturation can make your video look vibrant. But be careful. Too much looks unnatural and cheap.
- LUTs (Look-Up Tables): This is a pro trick. LUTs are like filters, but much more advanced. They apply a specific color style to your entire video with one click. There are LUTs for “Cinematic,” “Warm Film,” “Cool Blue,” and many more. Many creators use LUTs to achieve a consistent, professional look across all their videos.
To use a LUT in Alight Motion, go to your clip, find the color adjustment panel, and look for the LUT option. Select one, and see how the entire mood of your video changes instantly.
Tip Number 7: Do Not Overdo It With Effects
This is a very common mistake I see beginners make. They discover all the cool effects and transitions in Alight Motion, and they want to use ALL of them in one video.
Too many effects ruin your video. It distracts the viewer. It looks messy. And it screams “amateur.”
In 2026, the trend in professional video editing is minimalism. Clean, smooth transitions. Subtle effects. The focus should always be on your content, not the flashy edits.
Here is a good rule of thumb: Use effects to enhance your story, not to show off.
Ask yourself: “Does this effect add to the video, or is it just there because it looks cool?” If you are just trying to show off, cut it.
Stick to a few simple, elegant transitions. A smooth crossfade. A clean zoom. A subtle text animation. These are much more effective than a dozen different spinning, glitching, flashing effects.
Keep it clean. Keep it classy. Your audience will appreciate it.
Tip Number 8: Learn to Tell a Story
This might be the most important tip of all. The best editing in the world cannot save a bad story.
All the effects, color grading, and perfect cuts in the world mean nothing if your video does not have a clear purpose.
Before you start editing, ask yourself: “What is the point of this video?”
- Are you teaching something?
- Are you telling a funny story?
- Are you showing a product?
- Are you trying to make people feel something?
Once you know the purpose, everything you do in the edit should serve that purpose.
- If you are making a tutorial, your cuts should be clear and slow enough to follow.
- If you are making an emotional video, your music should support that emotion, and your transitions should be slow and gentle.
- If you are making a fast-paced action edit, your cuts should be quick, and your music should be energetic.
Structure your video like a mini-movie. Have a beginning (introduction), a middle (the main content), and an end (a conclusion or call to action). This keeps your viewers engaged from start to finish.
Tip Number 9: Use Speed Ramps for Dynamic Feel
A speed ramp is when you change the speed of a clip during the video. For example, you start a clip at normal speed, then quickly speed it up, and then slow it down again. This creates a very dynamic and professional feel.
You see speed ramps everywhere in modern editing. They are great for action videos, transitions, or just adding energy to a boring clip.
In Alight Motion, changing the speed of a clip is very easy.
- Select your video clip on the timeline.
- Look for the “Speed” option.
- You will see a graph. This is where you control the speed over time.
- Add points on the graph to change the speed. You can make it go fast, slow, or normal at different parts of the clip.
For example, you could speed up a clip of someone walking, and then slow it down right when they reach the center of the frame. This emphasizes the action and looks really cool.
Speed ramps are a signature of cinematic mobile editing. They add that extra layer of polish that makes people think, “Wow, this was made on a phone?”
Tip Number 10: Export Correctly
You did all the hard work. You spent time editing, adding effects, and perfecting the colors. Do not ruin it at the finish line.
Export settings are the final step, and they are crucial. If you export with the wrong settings, your video might look blurry, pixelated, or take forever to upload.
Here is what you should do in 2026:
- Format: Always choose MP4. It is the universal standard that works everywhere.
- Resolution: Choose 1080p or 4K to match your project settings.
- Frame Rate: Match your project’s frame rate (30 or 60 fps).
- Bitrate: This controls the quality and file size. I recommend setting this to High or at least 20 Mbps. This keeps your video sharp without making the file too massive.
- Remove Watermark: If you are using the Pro version of Alight Motion, make sure to toggle off the watermark. Your content is yours. It should not have a distracting logo on it.
- Save to Device: Export the video to your phone’s gallery. Then, you can upload it directly to your favorite social media platform.
By following these export settings, you ensure your masterpiece looks just as good when your audience watches it as it did when you were editing it.
Bonus Tip: Practice, Practice, Practice
I know you were expecting ten tips, but here is a bonus one that is more important than all of them combined.
The only way to get better is to practice.
Do not expect your first edit to look like a Hollywood movie. It will probably look rough. That is okay. Everyone starts somewhere.
The creators you admire on social media have made hundreds, maybe thousands, of videos to get to where they are. They have made mistakes. They have deleted projects. They have learned from their failures.
You will too.
So, start today. Pick up your phone. Open Alight Motion. Follow the tips I have shared with you. Make a video. Show it to a friend. Ask for feedback. Then make another one.
Every single video you make will be better than the last one.
Final Thoughts
So there you have it. My 10 tips for professional mobile editing that will boost your content quality in 2026.
Let us recap quickly:
- Light is everything: Good lighting is the foundation.
- Start with the right settings: Resolution, frame rate, and aspect ratio.
- Master the art of cutting: Keep it tight and fast-paced.
- Use keyframes to bring your static elements to life.
- Audio quality matters more than video: Get a mic and clean up your audio.
- Color grading adds that cinematic and professional touch.
- Do not overdo it with effects: Keep it clean and minimal.
- Learn to tell a story: Give your video purpose and structure.
- Use speed ramps for a dynamic and engaging feel.
- Export correctly with the right settings to preserve your quality.
Mobile editing has never been more powerful or accessible. Apps like Alight Motion give you the tools that were once only available on expensive desktop software. The only thing standing between you and professional-looking videos is the knowledge and the willingness to practice.
Now, you have the knowledge. The rest is up to you.
Go out there and create something amazing. Your audience is waiting.
And remember, you can always come back to alightmotionapp.site for more tips, guides, and updates on the best ways to use Alight Motion Pro and other editing tools.
Happy editing, my friend!